:: home :: interests :: video games :: mame arcade ::
![]() MAME stands for Multiple Arcade Machine Emulator. It is
a piece of software that can emulate the old arcade machines
of the 80's and early 90's. Given a ROM file of an old game,
it'll reproduce the workings of the arcade game on any PC.
MAME stands for Multiple Arcade Machine Emulator. It is
a piece of software that can emulate the old arcade machines
of the 80's and early 90's. Given a ROM file of an old game,
it'll reproduce the workings of the arcade game on any PC.
So what a lot of crazy people do is build an entire arcade cabinet and put a computer in it. That way you have the software emulating the game, and you have the hardware of the cabinet, controls, buttons, coin slot, etc filling out the rest of the arcade experience.
![]() I guess I'm now one of those crazy people. Here I've chronicled
my adventure as I built a cabinet from scratch, installed the
controls, hooked up the computer, and installed it in my
company's game room (along with the
foosball table I built in 2002).
I guess I'm now one of those crazy people. Here I've chronicled
my adventure as I built a cabinet from scratch, installed the
controls, hooked up the computer, and installed it in my
company's game room (along with the
foosball table I built in 2002).
Quick jumps:
[materials]
[construction]
[controls]
[computer]
[finishing]
[photos]
[links]
MATERIALS
This is what I bought:
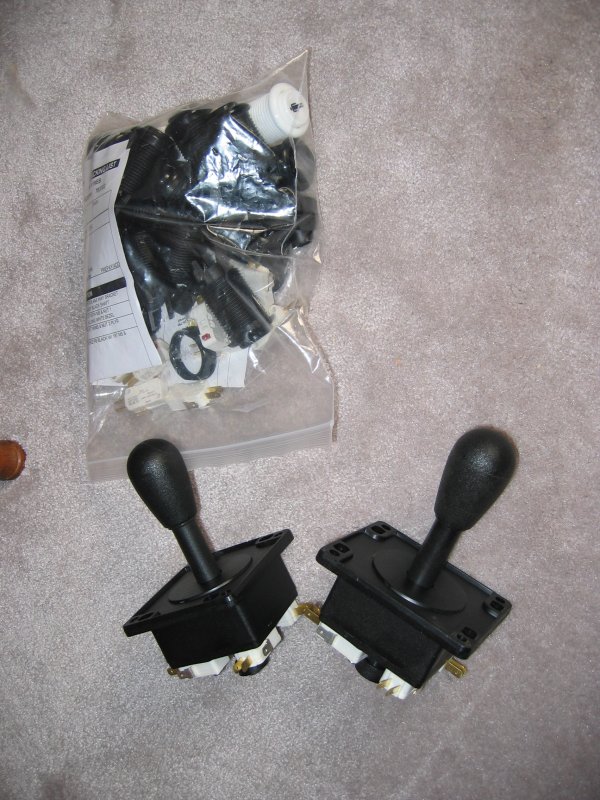
- 12 black buttons ($1.85 ea)
- 1-player and 2-player start buttons ($1.95 ea)
- 2 joysticks ($14.50 ea)
- I-PAC controller board ($39)
- Coin door ($90.40)
- 3 sheets of 3/4-inch 4x8 MDF ($19 ea)
- Plexiglas for monitor bezel, marquee, and control panel ($20)
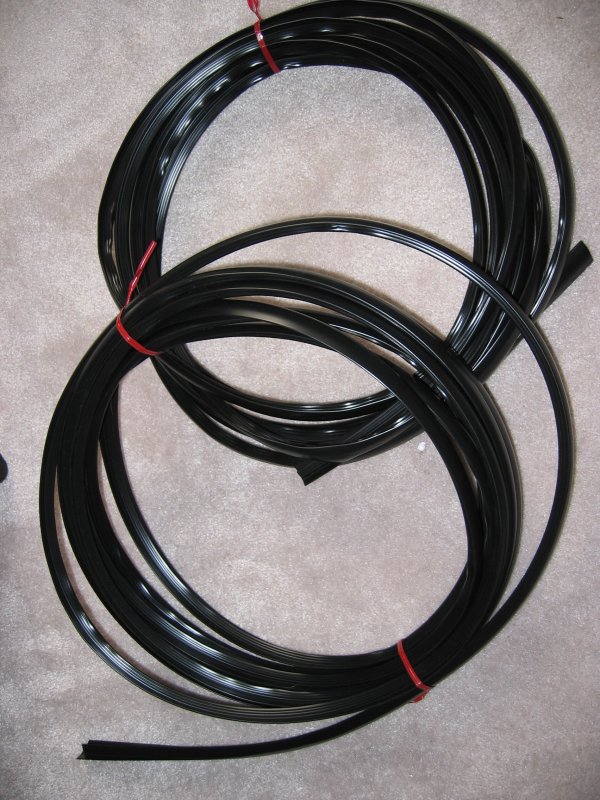
- 10 feet Marquee retaining trim ($12.05)
- 40 feet of Black T-molding for the edges of the MDF ($14.80)
- 100 Wood screws (#8) ($4)
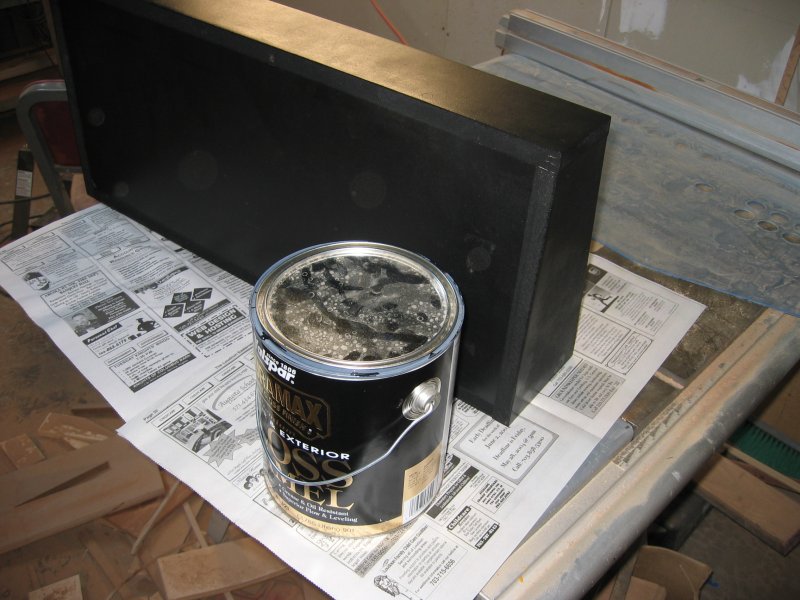
- 1 gallon Gloss black paint ($18)
- Trackball, 2.25 inch (new!) ($36)
- Opti-PAC trackball interface board (new!) ($39)
CONSTRUCTION
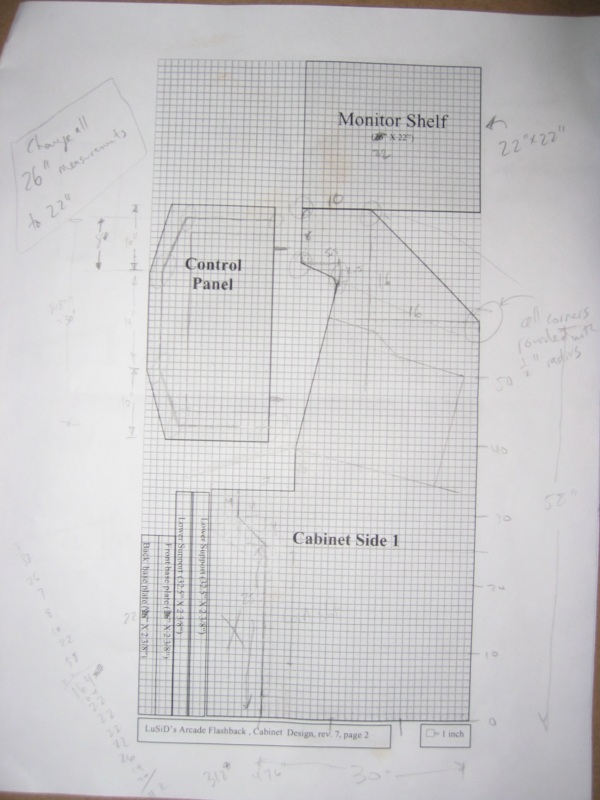
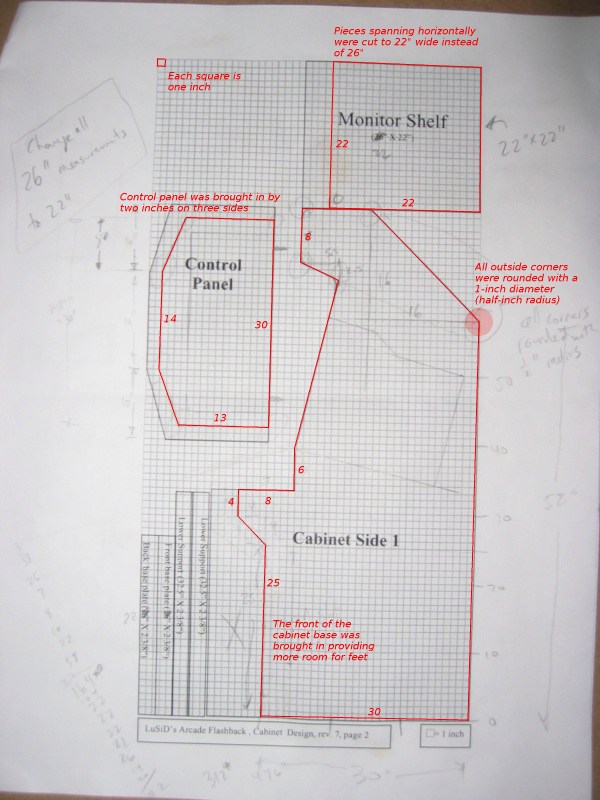
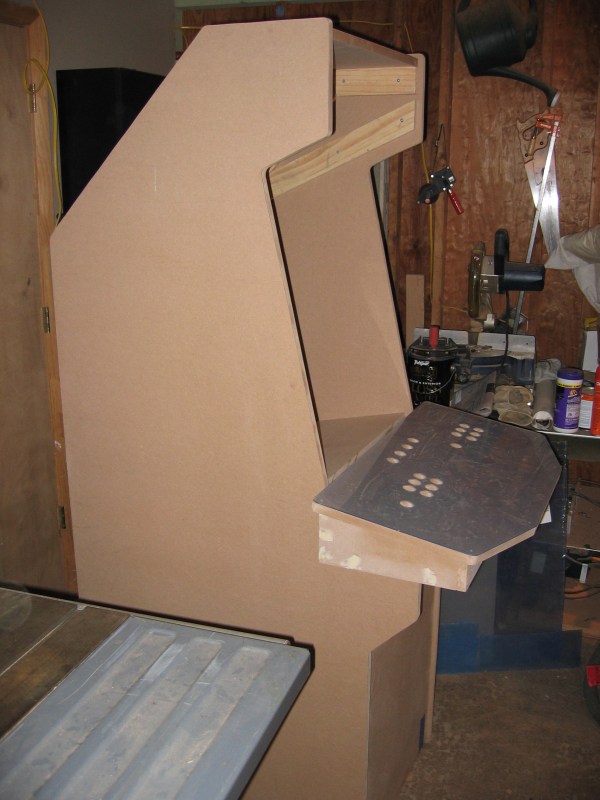
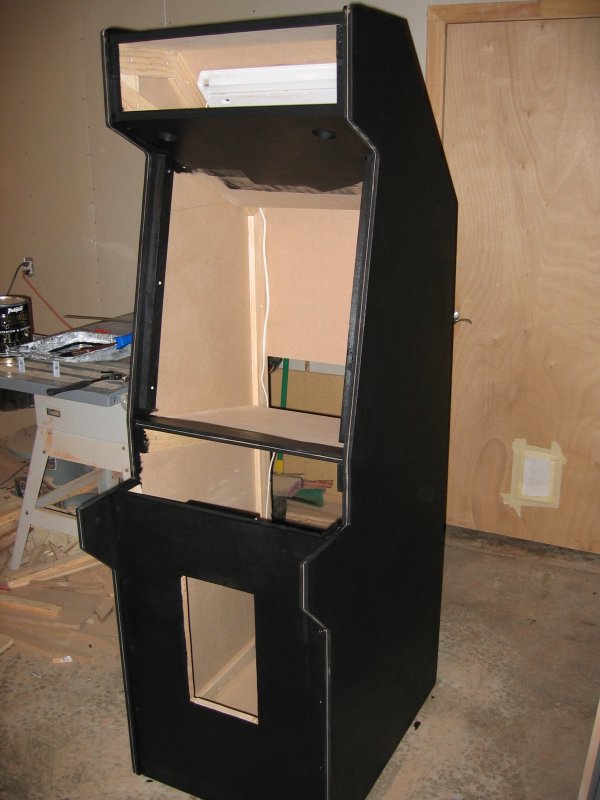
I'm using the plans from luSID's arcade flashback with some slight modifications. Instead of the cabinet being 26 inches wide inside, I'm shrinking it to 22 inches. I'm also cutting in the sides of the base of the cabinet so it gives some more room for feet. The control panel is also slightly smaller (two inches smaller on each side and the front). On the picture of the plans below you can kinda make out my changes drawn in. Click HERE for a better marked up version of the plans with notes and measurements.
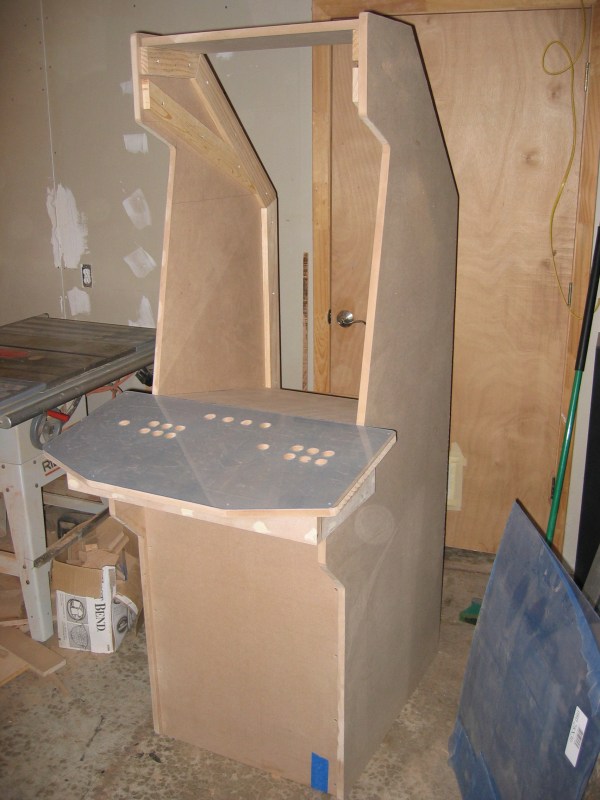
On day one I cut out both sides and constructed most of the control panel. MDF is pretty heavy stuff, so it was quite a feat getting the 6-foot-tall sides cut out using a band saw and a jig saw. The control panel pieces were much easier since most cuts could be done on the table saw.


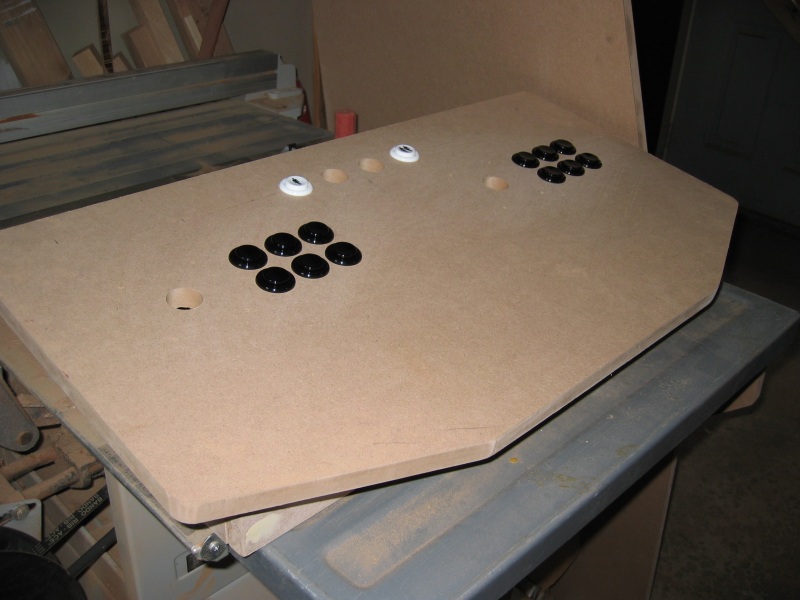
On day two I worked on the control panel. I filled in screw holes with wood filler, placed the template for the joystick and button positions, and drilled the holes. In the second picture you can see some buttons placed temporarily.

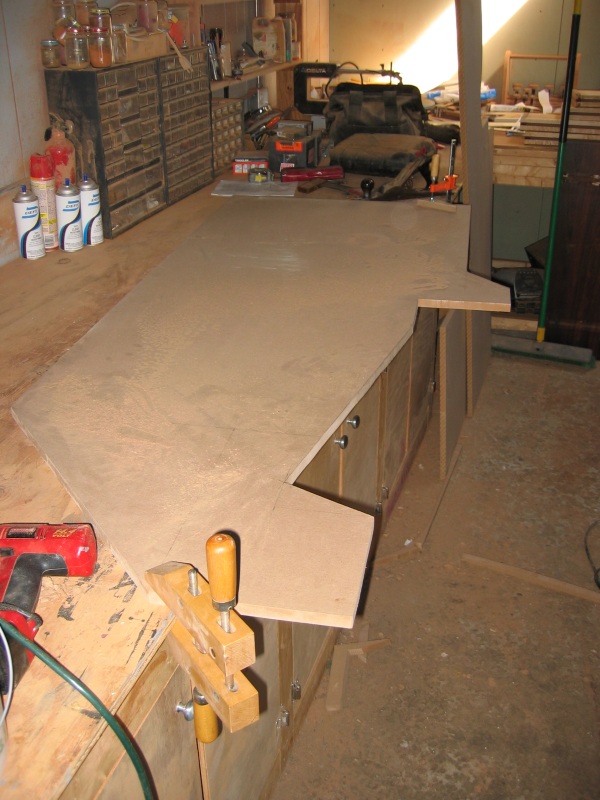
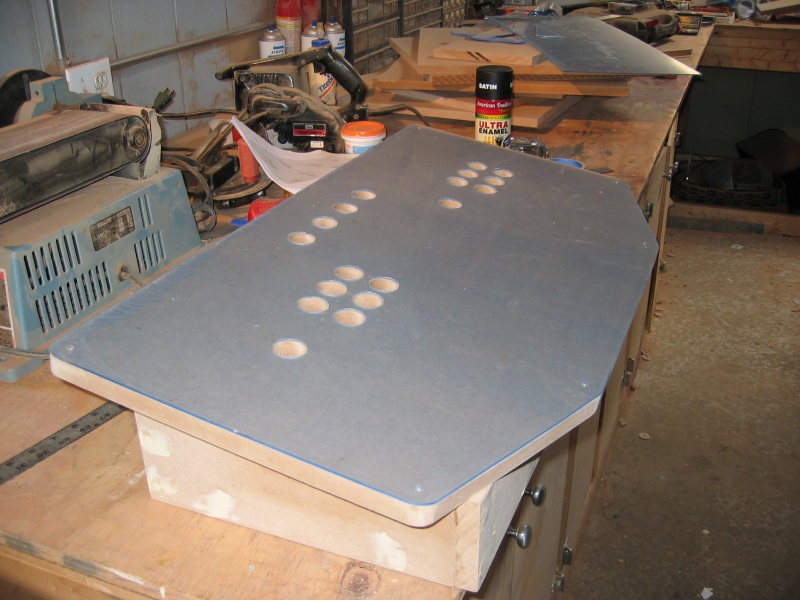
On day three I cut out all the pieces that span the width of the box, so all the pieces that span left-to-right are 22 inches wide. I also cut out the plexiglas for the top of the control panel and cut all the holes in it to match with the control panel MDF cut the day before. Another piece of plexi was cut to make the marquee. Using a bunch of 1x3's, I put bracing all around the inside edges of the two cabinet sides, 1.25 inches in from the edge. This would allow me to then attach the flat panel pieces to the edges of the bracing instead of directly to the cabinet, avoiding screw holes on the sides. The resulting panels would then be set in a half an inch from the edge as was common with arcade machines in the 80's.
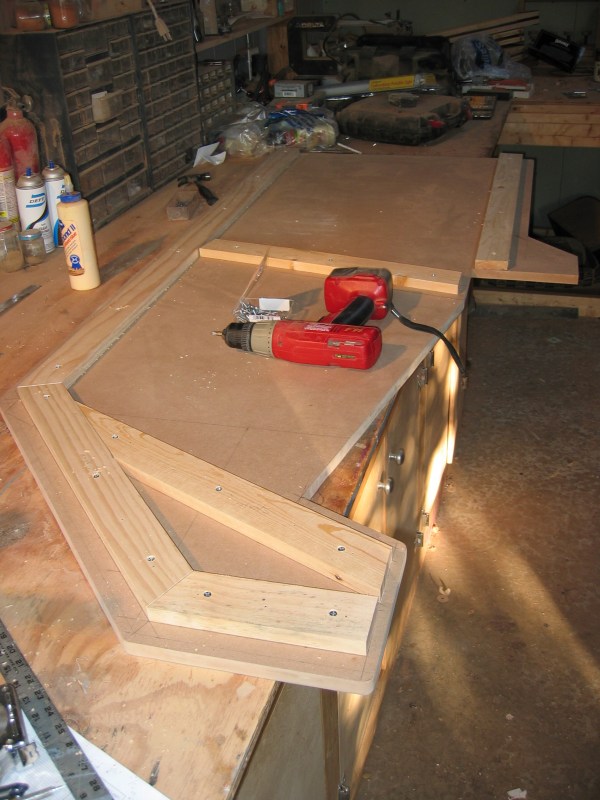
I then attached the bottom, front coin door, and back bottom pieces to the two sides. Finally it was standing! In the pictures below the control panel is just resting in place.
Unfortunately for the MAME cabinet, day four was a work day (as in real work, like my day job and all...). I managed a couple hours of some small tasks while I waited for more parts to arrive. I cut the mitre angles on the top and back MDF pieces, and attached them in place. I then installed the marquee light. I had to at least tape the marquee in place to test it out as you can see in the images below. The holes below the marquee are for the speakers and are covered when the speakers are in place.

Day five only allowed about an hour of work on the cabinet, but most of the parts I had been waiting for came in. I routed the slots for the t-molding and started painting. The amazing coin door came, too. It's quite impressive. Below are pictures of the coin door, the joysticks and buttons, the t-molding, the routed slot detail, and the first coat of black paint on the control panel box.


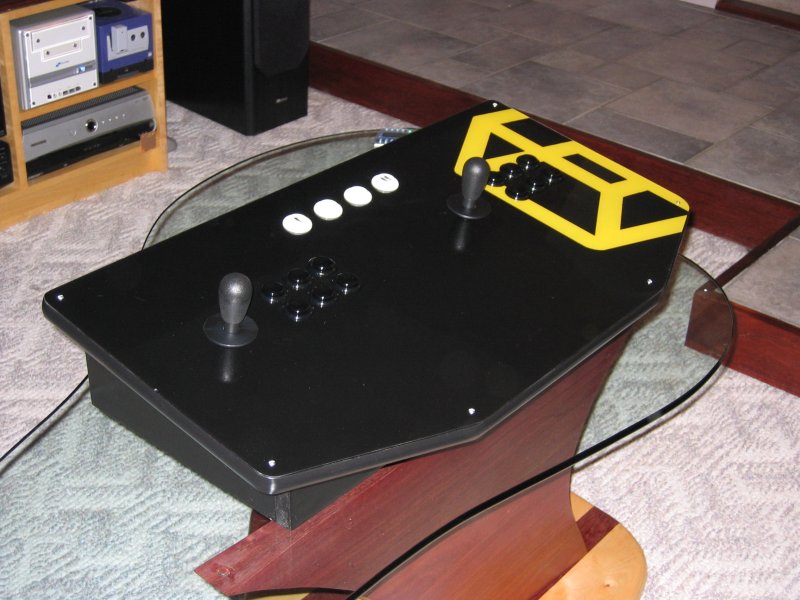
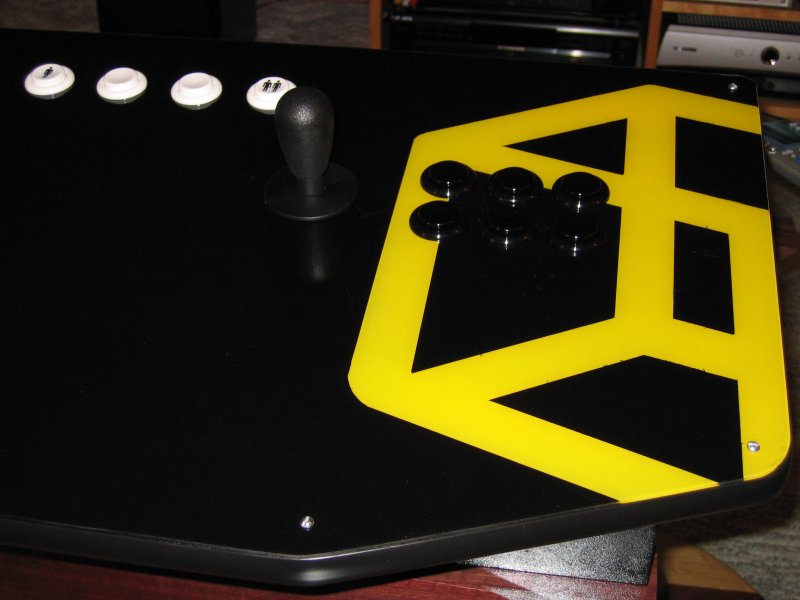
Day six involved a lot of painting. Not as much as came the next day (painting the main cabinet), but I at least finished the control panel, including painting the box and panel, painting the plexiglas cover (with logo), installing the buttons and joysticks, and adding the t-molding trim around the panel.
Day seven. The last day of construction. I wired up the control panel and tested it (pics of the control panel wiring are down below in the controls section). I made some last cuts for the coin door, the monitor shelf, and the monitor bezel braces. I then started painting the cabinet. I used a high-quality black gloss paint with foam rollers made specifically for smooth surfaces. The pictures below were taken after only the first coat; two more were applied.

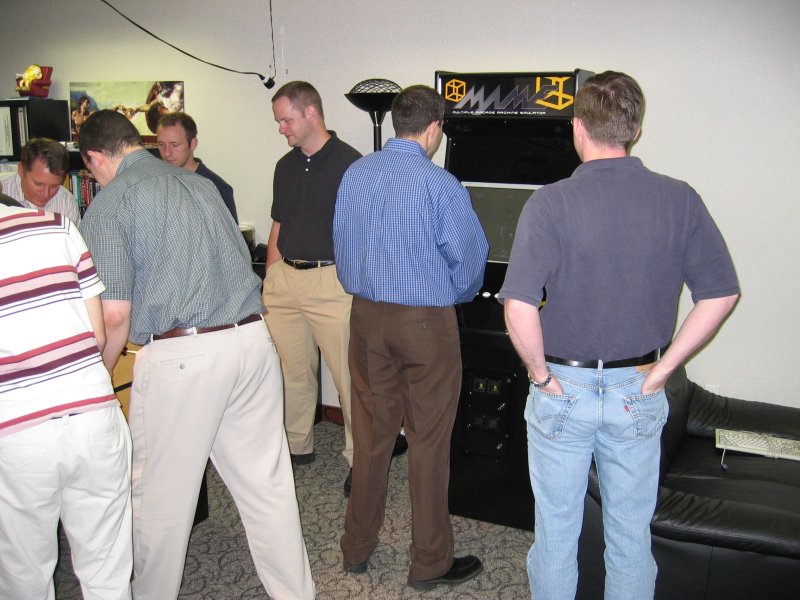
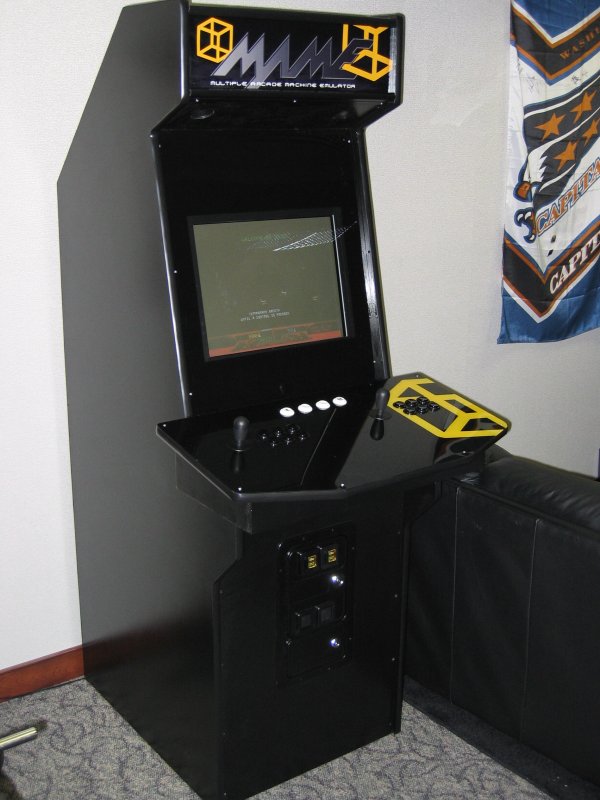
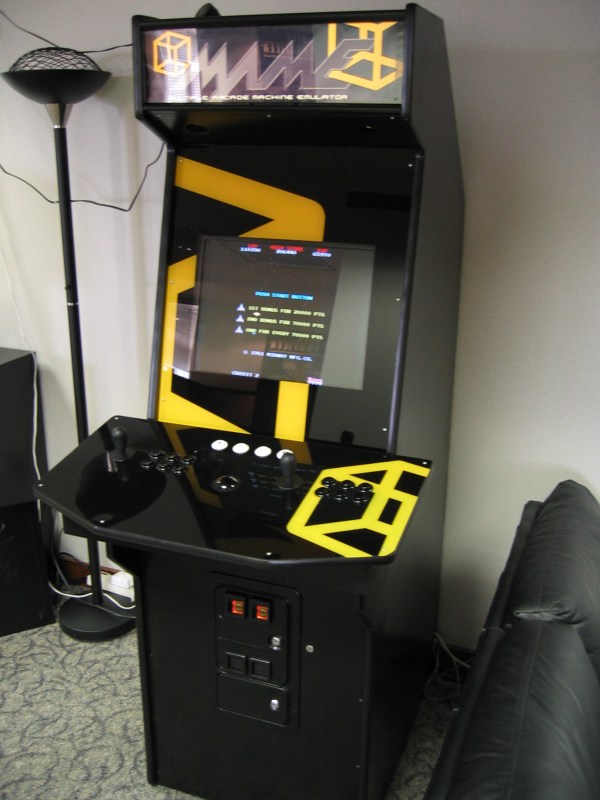
After three coats of paint, the coin door was installed, the control panel secured in place, and the marquee was installed. Now it was time to transport it to the office and install the computer and monitor! For final pictures of the arcade in the office, check down below in the photographs section.
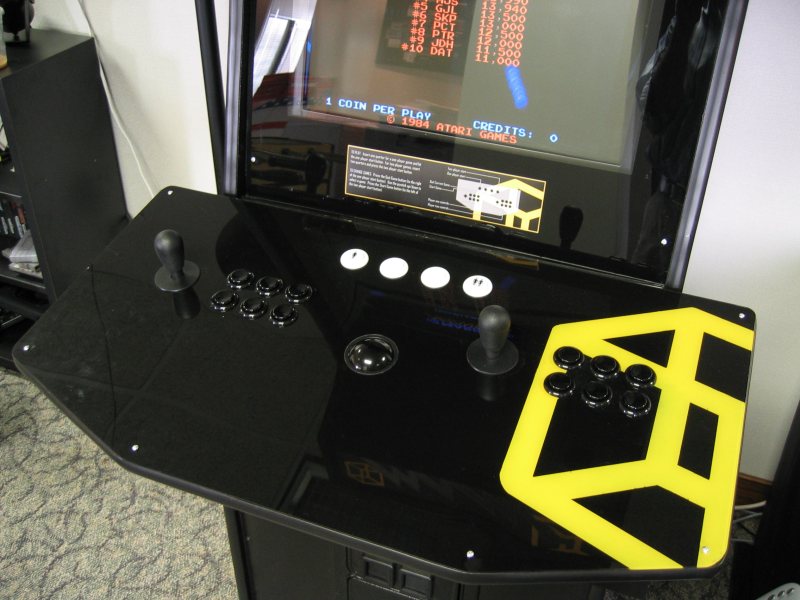
CONTROLS
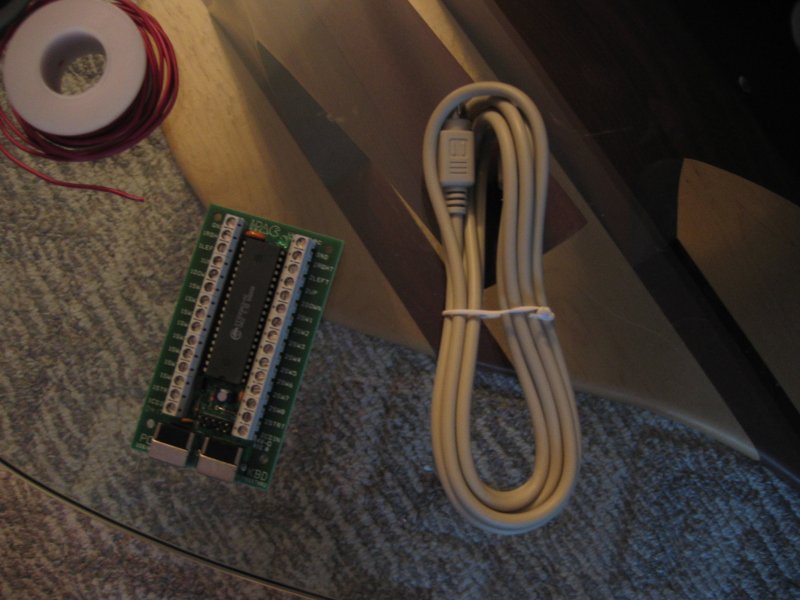
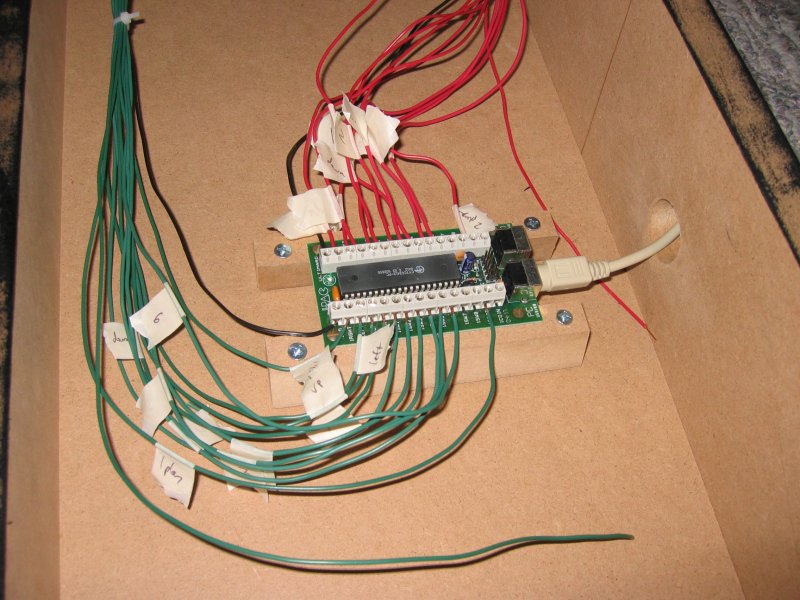
I ordered the buttons (16 total) and joysticks (2) from Happ Controls. The interface board is the I-PAC from Ultimarc which acts as a keyboard bypass. It connects with a standard PS/2 cable to the keyboard port of the computer, and simply sends appropriate key presses. For example, when you hit the 1-player button on the control board, the wires are hooked from that switch to the I-PAC, which then translates that to a keypress of the '1' character on the keyboard, and so MAME gets the 1-player-start signal.
I secured the I-PAC board to the bottom of the control panel box, and started wiring. All the common grounds I collected at various bus points underneath the panel top so I could then just run one wire to the ground pin on the I-PAC board.
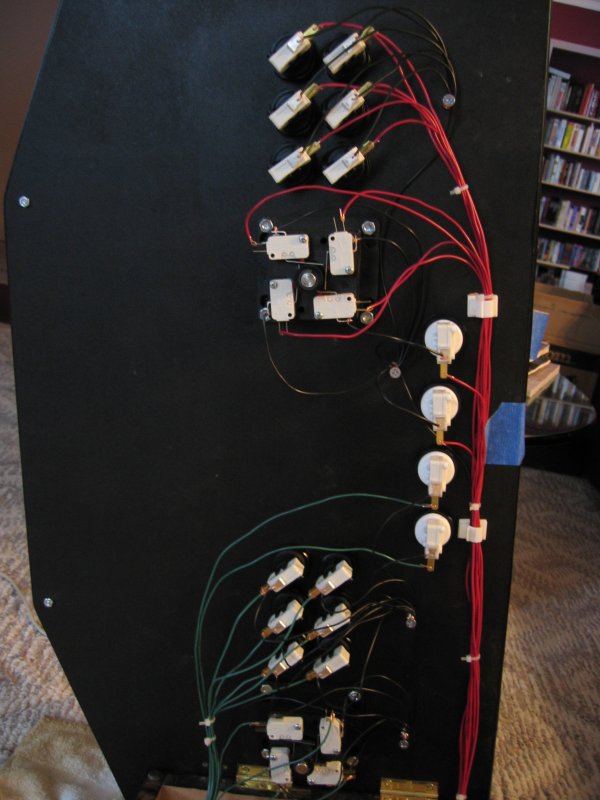
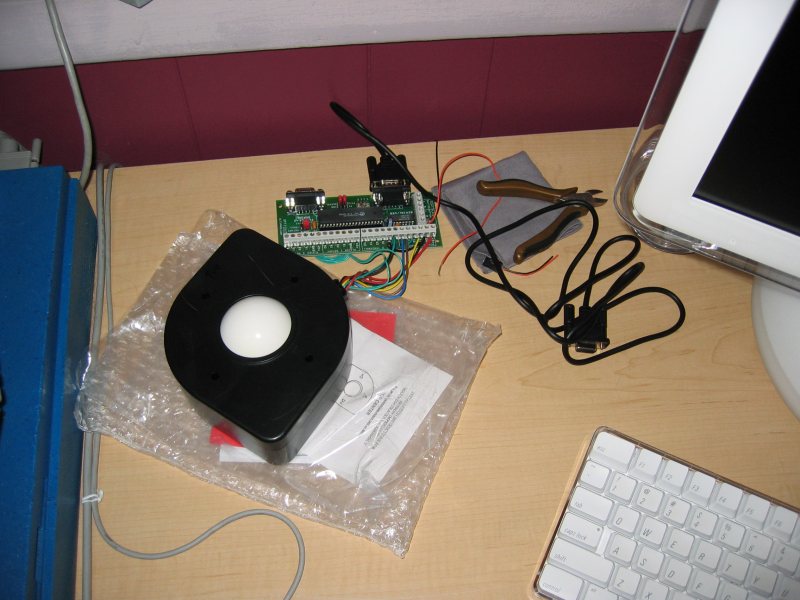
update! 06.28.04 I added a trackball. I used a 2.25-inch Centipede trackball and the Opti-PAC interface board from Ultimarc hooked up to the serial port (so it acts like a mouse as far as X and MAME is concerned). I bought a black replacement ball from Happ so it blends in nicely with the rest of the control panel.
COMPUTER
The computer is an old Dell 700Mhz PIII. I installed Fedora Core 2 (Linux) and xmame 0.82. I then transferred over all the ROMs I wanted to use, along with bezel artwork and everything that makes MAME complete. I installed ppfe2 (a Perl GTK app) to allow for game selection, but I do not intend that to be used by anyone other than me. I'm going to set the arcade machine up so that every day a new ROM will be used, and that one game will be on for the duration of the day. I happened to have an extra wireless keyboard so I hooked up the little receiver thingy to the Keyboard port in the I-PAC to allow me to do system hacking and troubleshooting when necessary. I also hooked up a subwoofer inside to get that proper rumble.
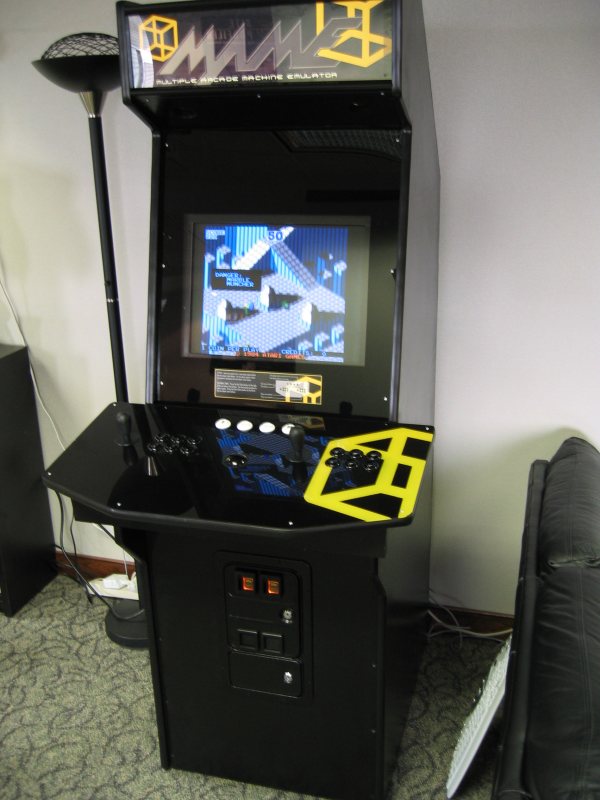
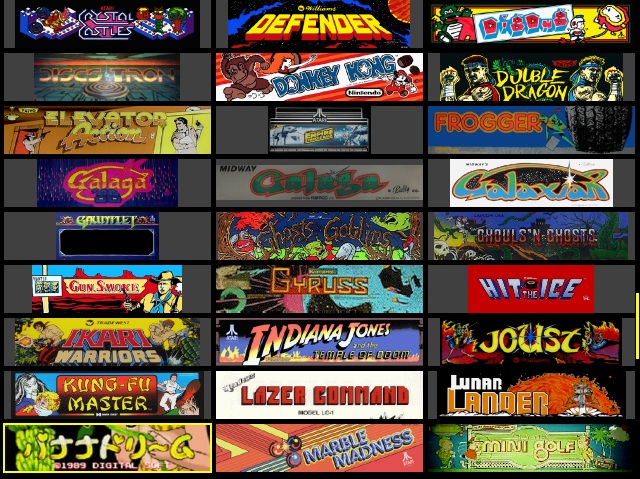
Update 08.04.04: Instead of the ppfe2 frontend program that I was using before, I finally got around to installing and configuring advanceMENU. It's incredible. I set mine up to display a grid of marquee images. The user can navigate the various titles with the joystick, and then simply press the Start button that I have up next to the one- and two-player buttons. A screenshot is below:
FINISHING
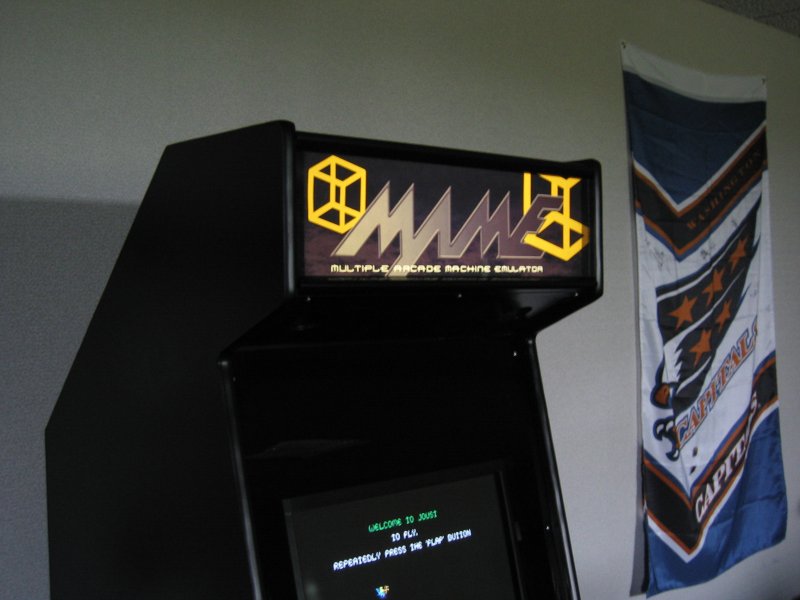
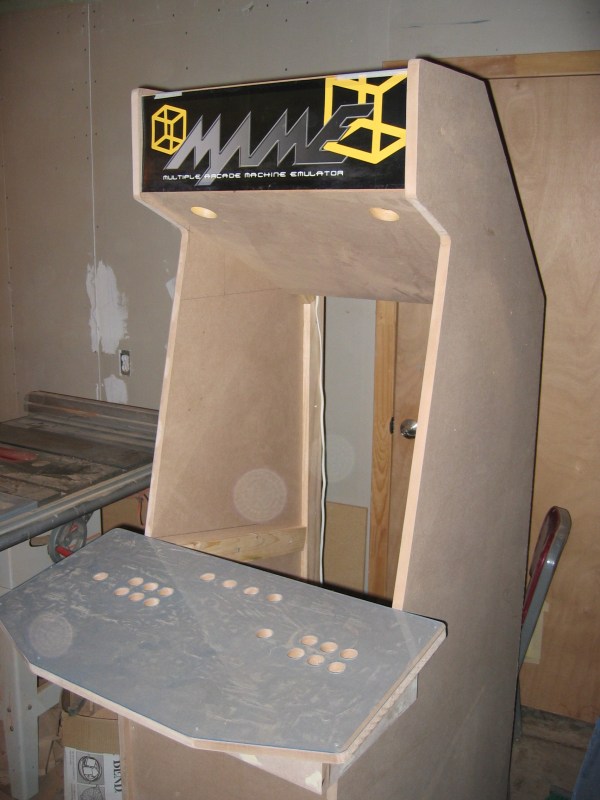
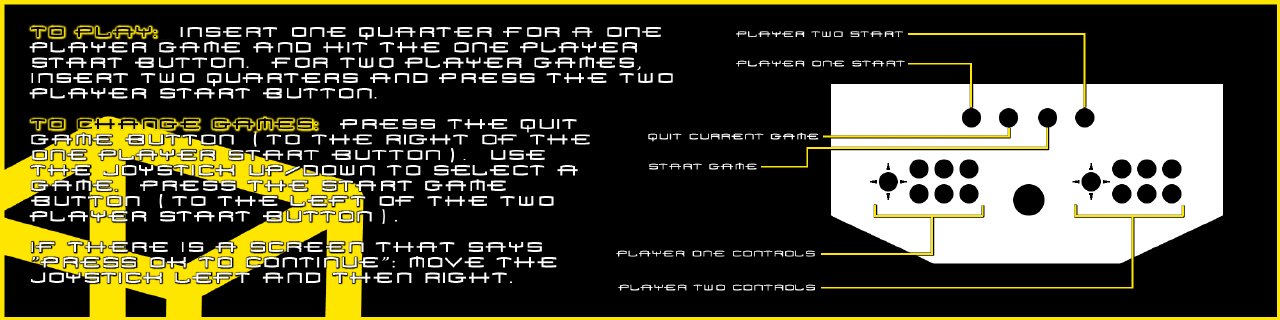
I made a marquee image for the top of the arcade. The image is printed on glossy photo paper then sandwiched between two pieces of plexiglas and held in place with marquee retaining trim from Happ Controls. The marquee image features the MAME logo and the logo of my company since the arcade is to be located in the game room at work. I also made a small label that will go on the monitor bezel with play instructions.

The marquee is lit from behind using an 18-inch flourescent light meant for lighting kitchens counters, etc. The power cords for the light, the speakers, the computer, and the monitor are all plugged into a power strip installed inside the cabinet.
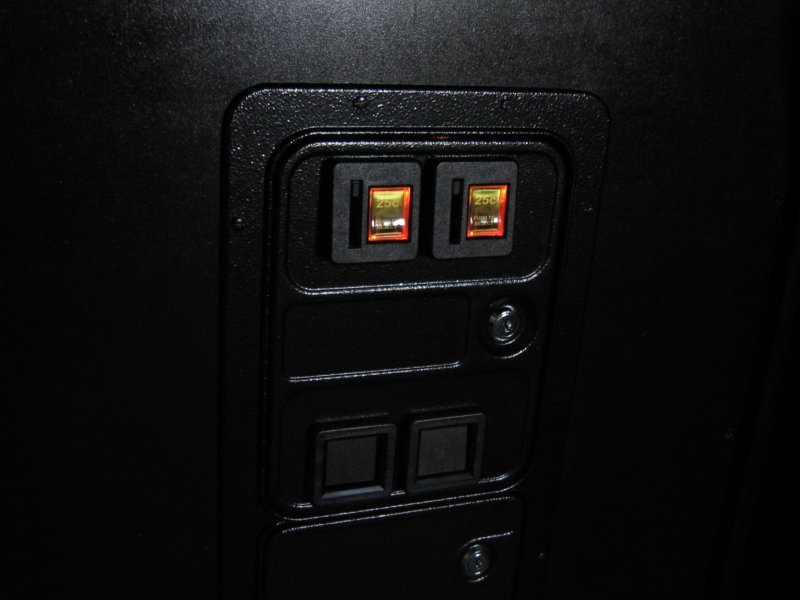
I installed the coin door and wired up the switches to give credits to the MAME games as they should in real arcades. I also tapped into the computer 12-volt power supply to light the two light bulbs that illuminate the coin reject buttons.
update 8.16.04: I installed a new monitor bezel as can be seen in the last picture below in the photographs section.
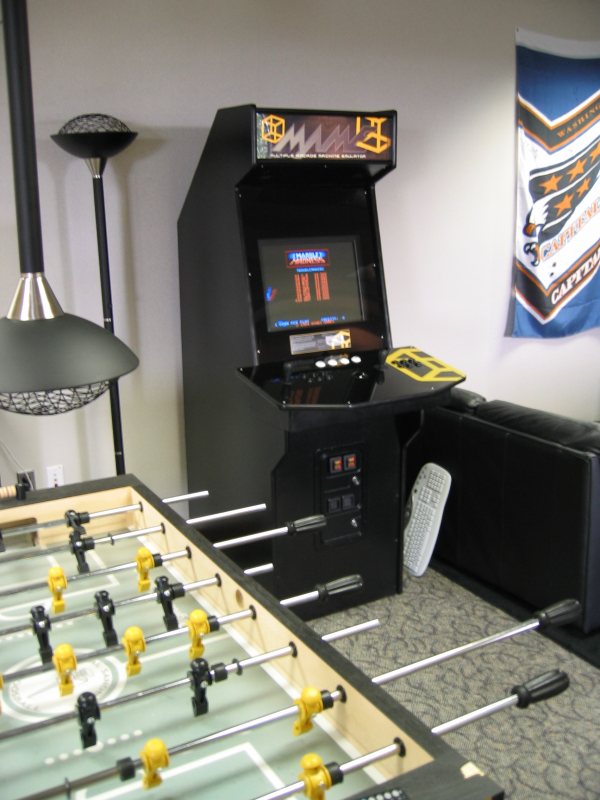
PHOTOGRAPHS
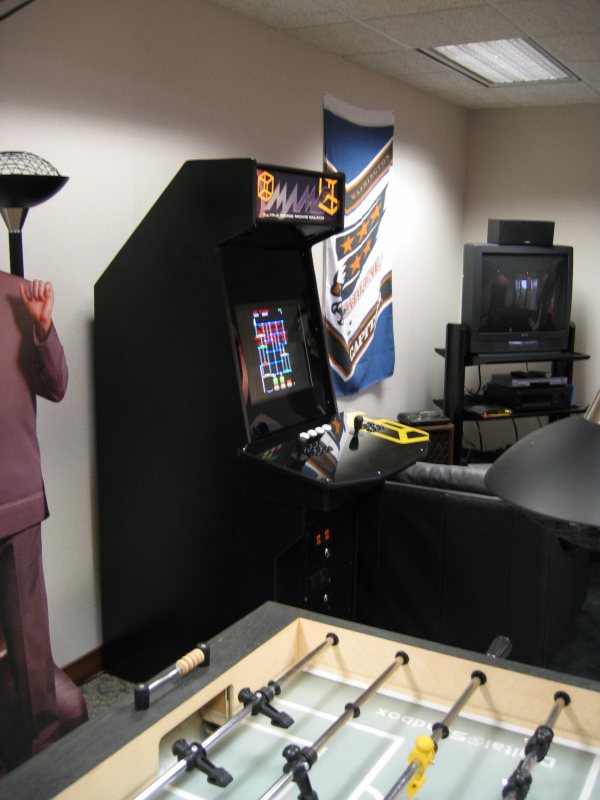
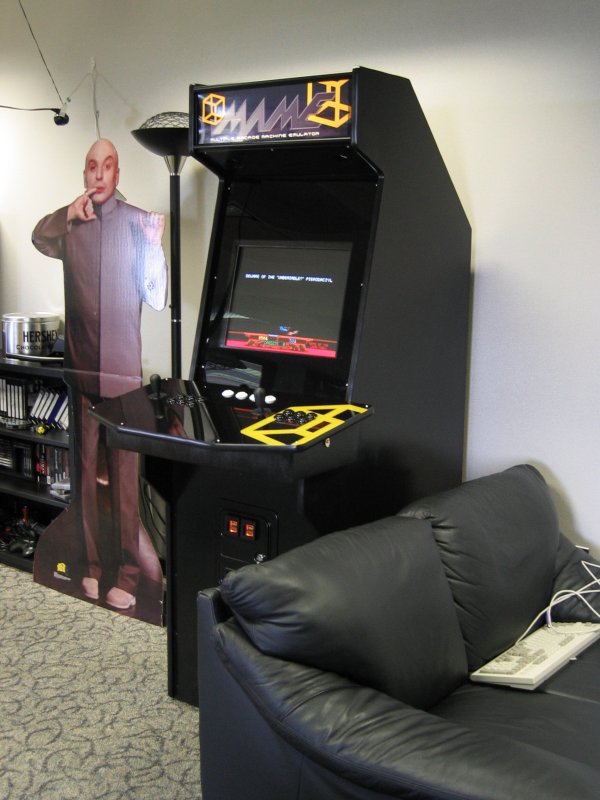
Here are some photos of the finished cabinet in the company gameroom.