. home . interests . linux pvr . howto .
 The installation docs
on the MythTV site are excellent. These notes
below are meant to fill in gaps and address issues I had with my
specific hardware and software setup.
This page is
an excellent writeup about Linux on the SS40G.
The installation docs
on the MythTV site are excellent. These notes
below are meant to fill in gaps and address issues I had with my
specific hardware and software setup.
This page is
an excellent writeup about Linux on the SS40G.
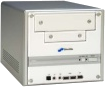
- Make sure you have all the necessary hardware. You need a computer (Shuttle XPC SS40G)
with a decent processor (AMD Athlon XP 1700+), a lot of storage space (80GB Seagate), and
some memory (256MB PNY DDR RAM). You need a TV tuner card (ATI Wonder TV VE),
and a sound card that'll do duplex sound (record and play at the same
time - SoundBlaster Ensoniq es1731). An IR receiver/transmitter also
helps (ActiSys IR-200L), and perhaps a wireless keyboard/mouse combo
(Logitech Wireless Duo). Total cost: $531.
-
Install RedHat 8.0 from the three CDs. You can grab the disc ISO
images from linuxiso.org.
Make sure you choose to install the following packages: Kernel Development (kernel
source code), KDE Desktop Environment, Development Tools, KDE development,
X Software Development, and SQL Database Server (MySQL).
- Be sure to choose lilo as the bootloader. When you reboot after installation,
hit Ctrl-X at the lilo screen to get a text 'boot: ' prompt. In order to get
the PCI bus working with pre-2.5 kernels (RedHat 8.0) type in:
boot: linux pci=bios,biosirq
Later on you need to add this to the /etc/lilo.conf append section so you don't have to do that on evrey boot. Be sure to run /sbin/lilo to reload the bootloader after any changes to lilo.conf.
- On first boot you'll be asked to add new hardware, such as all the devices on
the (now working) PCI bus, and the bttv Tuner card. Choose 'configure' on all these
to add them to your system. For the network card, I set mine up to use DHCP since
I have this machine on my local LAN behind a firewall.
- Install the qt-MySQL package. This RPM should be on one of your disks under
the RedHat/RPMS/ directory. Or you can just go to a redhat mirror site like
this one and grab it.
$ rpm -Uvh qt-MySQL-3.0.5-17.i386.rpm
- For the next step with some of the supporting software you may run into
weird errors complaining about 'UTF-8'. If so, do this:
$ LANG="en_US"
- Then be sure to add /usr/local/lib to your /etc/ld.so.conf file.
- Install LAME. Grab the source from from lame.sourceforge.net.
Current version is 3.93.1.
$ tar -xvzf lame-3.93.1.tar.gz
$ cd lame-3.93.1
$ ./configure
$ make
$ su
# make install
# exit - Install XMLTV. This is the program that goes out to the Web to grab all programming
information for all your channels. Grab the source from
sourceforge.
Current version is 0.5.8.
$ tar -xjf xmltv-0.5.8.tar.bz2
$ cd xmltv-0.5.8
$ su
# perl -MCPAN -e shell
cpan> install XML::Twig
cpan> install Date::Manip
cpan> install LWP
cpan> install XML::Writer
cpan> exit
$ perl Makefile.PL
$ make
$ su
# make install
# exit - Check for XV support. Now this step was a little difficult. It
turns out the the default sis driver that comes with XFree86 4.2.0 (packaged
in RedHat 8.0) does not support the newer SIS chip found in the Shuttle.
Therefore, you have to bulid yourself a new sis driver. The steps
for doing so are found
here. Basically,
you have to make sure you grab the XFree86 source RPM (found in the SRPMS
directory), copy over the new driver code found on that page, then
rebuild X. You can then just copy over the sis_drv.o file into the
/usr/X11R6/lib/modules/drivers/.
Then be sure to add the following lines in your /etc/X11/XF86Config
file:
...
Section "Device"
Driver "sis"
Identifier "SiS 630"
VendorName "SiS"
BoardName "630"
Option "TVStandard" "NTSC"
Option "ForceCRT2Type" "TV"
EndSection
... - Time to build and install MythTV.
Log in to the CVS server and grab the source:
Now you're ready to start compiling. Change to the MC directory and run:$ mkdir mythtv $ cd mythtv $ cvs -d :pserver:mythtv@cvs.mythtv.org:/var/lib/cvs login Logging in to :pserver:mythtv@cvs.mythtv.org:/var/lib/cvs CVS password: mythtv $ cvs -z3 -d :pserver:mythtv@cvs.mythtv.org:/var/lib/cvs checkout MC $ cvs -z3 -d :pserver:mythtv@cvs.mythtv.org:/var/lib/cvs checkout mythgallery $ cvs -z3 -d :pserver:mythtv@cvs.mythtv.org:/var/lib/cvs checkout mythgame $ cvs -z3 -d :pserver:mythtv@cvs.mythtv.org:/var/lib/cvs checkout mythmusic $ cvs -z3 -d :pserver:mythtv@cvs.mythtv.org:/var/lib/cvs checkout mythweather
At this point all the executables for the basic MythTV will be installed, but you have to set up the database.$ ./configure $ make $ su # make install # exit
$ cd database
$ su
# myslq < mc.sql
# exit
- Setting up MythTV basically entails using the new graphical setup
program to hook it up to your video card and determine how to grab programming
information for you. Go back to the mythtv/MC/ directory and
run setup/setup. After that you will have to run
mythfilldatabase to use XMLTV to grab all the programming information
for the week. This takes a *long* time.
- Install the ALSA sound drivers.
More to come...
For now see chapter 7 of the Myth docs.
NOTE: If you upgrade your Linux kernel you need to re-compile the ALSA modules and libs!
- Install MythMusic.
First you need some other packages installed. I grabbed the source tarballs for
the following:
For each, extract, then run the good ol' ./configure;make;make install. Also verify you have the SDL-devel package installed by doing a rpm -ql SDL-devel. Then change back to your mythtv/mythmusic directory where you checked out the source from CVS.
Then you need to edit the /usr/local/share/mythtv/mythmusic-settings.txt file to point it to the right directory to search for music files. I have my sound files in directories /usr/local/sounds/mp3/ and /usr/local/sounds/ogg/, so I set the search directory to /usr/local/sounds.$ ./configure --enable-sdl $ make $ su # make install # mysql < musicdb/metadata.sql # exit
- I would recommend installing the ntpd
daemon to sync the system clock to a time
server to make sure you start and stop the recordings right on time.
- Getting the remote control working can be a little tricky. After several
iterations, I ended up getting an IR wireless keyboard/mouse combo. The IR receiver
just hooks into the PS/2 keyboard and mouse ports on the back of the Shuttle.
Then, using my Sony RMVL1000 learning remote, I taught my remote to send those signals.
If you have a learning remote, this is
the easiest and most reliable route for a remote interface to MythTV. Also, when
you need to type something or login to a shell for debugging or whatnot, you
have a nice little keyboard/mouse combo that hides nicely under the couch.
- Since I have a Dish Network satellite box that provides the incoming TV, I
had to have MythTV tell the box to change channels since I couldn't use the
internal tuner in the TV card (the incoming satellite feed is encrypted and
must be decrypted by the Dish receiver box). Using LIRC and a small circuit with
an IR LED, the Myth box can now signal to the Dish box to change channels. Grab
lirc from lirc.org. You need to
make sure you have the kernel source code configured for your currently-running
kernel.
Then add these lines to your /etc/rc.d/rc.local file:# tar -xvzf lirc-0.6.6.tar.gz # cd lirc-0.6.6 # ./setup.sh (select homebrew, and check off the transmitter option) # make # make install
You then need to install jvd_send, which is based off of the lirc package, but has specific stuff to get it to work with Dish Network receivers. You can grab that from here.setserial /dev/ttyS0 uart none insmod lirc_serial /usr/local/sbin/lircd
# tar -xvzf jvc_send-0.0.2.tgz
# cd jvc_send-0.0.2
# make
# cat JVC_4700.org >> /etc/lircd.conf